This will be a fairly opinionated look at tools and processes in that I’m not describing options and alternatives, and it is highly probable I’m not even describing the “best in class”. These are tools and processes that have worked successfully for me.
Bare Minimum Tools
To build a child theme the minimum tool you need is a plain text editor. Notepad, textedit, etc. But without an editor that will do basic syntax highlighting it may be a little agonizing. A few of the more popular editors are Notepad++ for Windows, BBEdit for OS X or Sublime Text for either platform (note: Sublime Text never seems to leave beta, but if you buy a license the dev builds tend to be newer and better, and still quite solid).
Access to server file system
This is not strictly speaking necessary, but it is quite handy when developing.
If you don’t have such access (this happens most often on production servers) you can use the following procedure if you have theme upload access. Compress all the theme files into a single zip file and upload it via WordPress’s theme interface.
As I said above, it is much handier though to have access to the server file system via FTP, SSH, WebDAV, CPanel file tools or via the local file system in case of a locally installed server.
Some of these require a command line in a terminal emulator. iTerm2 seems to be a sound choice for the OS X environment, for Windows it’s Powershell (installed with recent Windows versions).
Local/Development server
It is also handy to have a local (installed on your computer) development environment. This would include: web server software (generally Apache), database (mysql/mariadb) and PHP. This gives you a good platform for development and testing before you upload your child theme to the production server.
Unless you are familiar with setting up a server environment or enjoy multi-hour learning projects I highly recommend that you follow the advice of others in establishing a server setup for your environment. Find a good blog post for your OS that has a title something like “setting up a local WordPress server environment for (whatever your OS is)”.
The other alternative is to use a pre-packaged server setup (see below).
Traditionally I have used the following setups:
- For OS X I use the set up described in this article: https://mallinson.ca/osx-web-development/. It is a slick setup and after the initial configuration is quite hands-free. However lots of people use MAMP or XAMPP for its simplicity.
- For Windows I pop the money and use WampDeveloper. Again WAMP or XAMPP are also popular choices.
More recently however, container technology has matured and is proving to be quite useful for development. However, your “command line fu” should be fairly solid. Here are a couple of good options:
- Vagrant: https://www.vagrantup.com/
There is also the following setup created for WordPress development: https://github.com/Varying-Vagrant-Vagrants/VVV - Docker: https://www.docker.com/
Simple native docker clients exist for OS X, Windows and Linux. This is a technology that is coming on gangbusters and is a good one to learn.
Tools
Text editor/IDE

If you find yourself in a bar at a table with a few programmers and you want to have fun, start a conversation about text editors and IDEs. A fistfight almost always ensues. However, there are good reasons why programmers use the editors that they do. They tend to come with a bunch of great features: they are easy to use without taking your hands off the keyboard (mouse free), code highlighting, auto-completion and so on.
Vim
Vim is my editor of choice. I was noodling around with Sublime Text a couple of years back, an excellent text editor that I still keep it on my system. But I was at an Intro to Docker workshop given by local Kamloops developer Jonathan Bowers. He was using Vim. He didn’t speak about it really, he just used it and as he did the cursor seem to float about the page landing in just the right spot and making complex edits effortless.
I was intrigued, I started using Vim, had the usually first timer frustration, but found some good resources for beginners. Vim works much like constructing a sentence, with subject-verb-object. Change the test inside the tags…delete 3 words…that sort of thing.
After a couple of weeks it was hard for me to understand how anyone could use anything else. Now it causes me physical pain to try and work with MS Word and I’m still pretty novice in my VIM usage.
Please send me an email if you want me to recommend some starter VIM resources.
PHPStorm

Then I ran into an issue, because I had also started working with PHPStorm which is one of a suite of IDEs (Integrated Development Environment) developed by Jetbrains. Their flagship product is IntelliJ IDEA and they have a bunch of use/language specific variations. PHPStorm, as the name would indicate is focussed around creating shit-storms with PHP, but it also handles CSS, HTML and Javascript. And they have an educational price of nothing at all.
I don’t want to go into a laundry list of features, but it does have a WordPress integration feature that makes it the IDE of choice for WordPress development.
What a dilemma though, I was just getting used to Vim, but it is such a pleasure work in PHPStorm. What to do, what to do? Then I found the Vim plugin for PHPStorm, which gives you Vim text editing commands inside the PHPStorm IDE. Nirvana.
Version Control/Deployment
Without a protracted discussion about the importance of version control, suffice it to say that version control is simply mandatory in the development world. It provides a backup, it provides a record of how a project has changed over time and ways to compare versions, it enables multiple developers to work on a project simultaneously and then merge their work, and it also provides a simple and easy deployment workflow.
Git

I predominantly use Git. It makes sense to me, is quite widely used, and offers distributed version control. There are a variety of GUI-based clients (I can recommend some if you like), but I find that I’m better able to conceive and control what is happening on the command line. Oh, did I mention that PHPStorm has version control integration including Git? I have used it, but as I just said I prefer the command line.
CSS
A large part of WordPress customization, either inside or outside of child themes, is CSS-based. A large pile of CSS comes via WordPress, the theme and plugins. Quite often CSS work involves finding out what a current style is and overriding it. Remember one of our fundamental tenets, we leave WordPress core and original theme code alone and customize either in interface or via child theme.
Here are some tools that I find helpful.
Chrome Dev Panel/Firefox Dev Panel
The developer panel, amongst many other things, lets you find out what CSS is affecting a page element and quickly try out CSS changes and additions on a page to see if they will provide what you want.
Stylish Chrome Extension

Be aware that Stylish is using the phrase “Custom themes” in a different way than we are.
Once I have figured out what CSS I want to add/change, Stylish lets me collect it and then try it out across the site, turning it on and off, to see if I’ve broken anything anywhere else. Dev panels are good for trying things out and experimenting, but as soon as you reload your page or navigate somewhere else your changes are gone. Stylish lets you collect them.
Easy Google Fonts
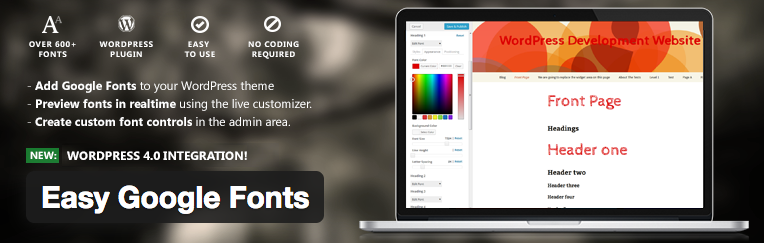
This was a last minute addition and although the primary purpose of this tool is to make it easy to spec Google fonts, it does so using CSS in a very clever way. Out of the box it lets you set quite a variety of type settings to the p and h1-6 heading levels.
But, and this is the magic, in the Settings area you can create what they call a “Font Control”. A Font Control is built on one or more CSS selectors, including fairly complex selectors. Then you can return to the Appearance interface and select type for your CSS-defined Font Control. Very slick for the type-o-philes.
Where to put the CSS
Once I have tested the CSS I then need to put it somewhere. There are also sorts of nooks and crannies in WordPress to tuck CSS. But, if I ever want to find it again, and not go insane looking for it, I always put all my CSS in one of two places: the custom CSS window on the appearance menu if I’m not using a child theme or in the styles.css file in the child theme if I am using one.
There is a very powerful extension to this process using SASS/SCSS. This uses a variation on CSS to provide some traditional programming constructs such as nested selectors, variables and function-like things. This code is then run through a pre-processor to generate CSS files.
Procedures
CSS Development Workflow
As outlined above my CSS workflow is:
- use the dev panel to locate the css I need to change
- write changes, tests and additions in the dev panel
- copy these to a stylish configuration
- test it across the site
- move it to custom css or styles.css
A word about specificity. Normally the rule of thumb with CSS is to use the least specific CSS that you can get away with. I do the opposite in large environments like WordPress (or Moodle) where I haven’t written most of the CSS and other code, and where I don’t know what I might break with low-specificity css.
In particular, I try to be specific enough with my css that I know it only applies to the things that I know about and want to change. This often involves two or three classes, my own custom classes and sometimes IDs. (Oh stop shaking your heads, it’s a survival strategy.)
Git Development/Deployment workflow
Another element of workflow that I have started using that works quite handily is a Git-based deployment workflow. It goes like this:
- I create some crappy code or overly specific CSS
- I create a local git commit following the commit description rule of thumb: don’t describe what you did (the code will generally tell you that anyway), describe why you did it.
- I push that commit up to Github or other remote repo
- SSH into the production server
- Using a Git deployment ssh key created on the production server and registered with the git repo, I
sudo -u www-data git pullin the target directory. Typically I’m working with apache servers and everything is owned by the www-data account. (If you are a *nix head I found a nifty article on avoiding repeated sudo-ing. Also, if you use iTerm2 and 1Password in an OSX environment there another nifty project called sudo-like-a-boss that lets you call up a 1Password window to drop your sudo password in an iTerm window when you need it. Email me if you want the skinny on either of these two things.) - With two terminal tabs open it takes seconds to commit locally, push the changes to a remote server and pull the changes to a production server.